
Binding flow
- 1
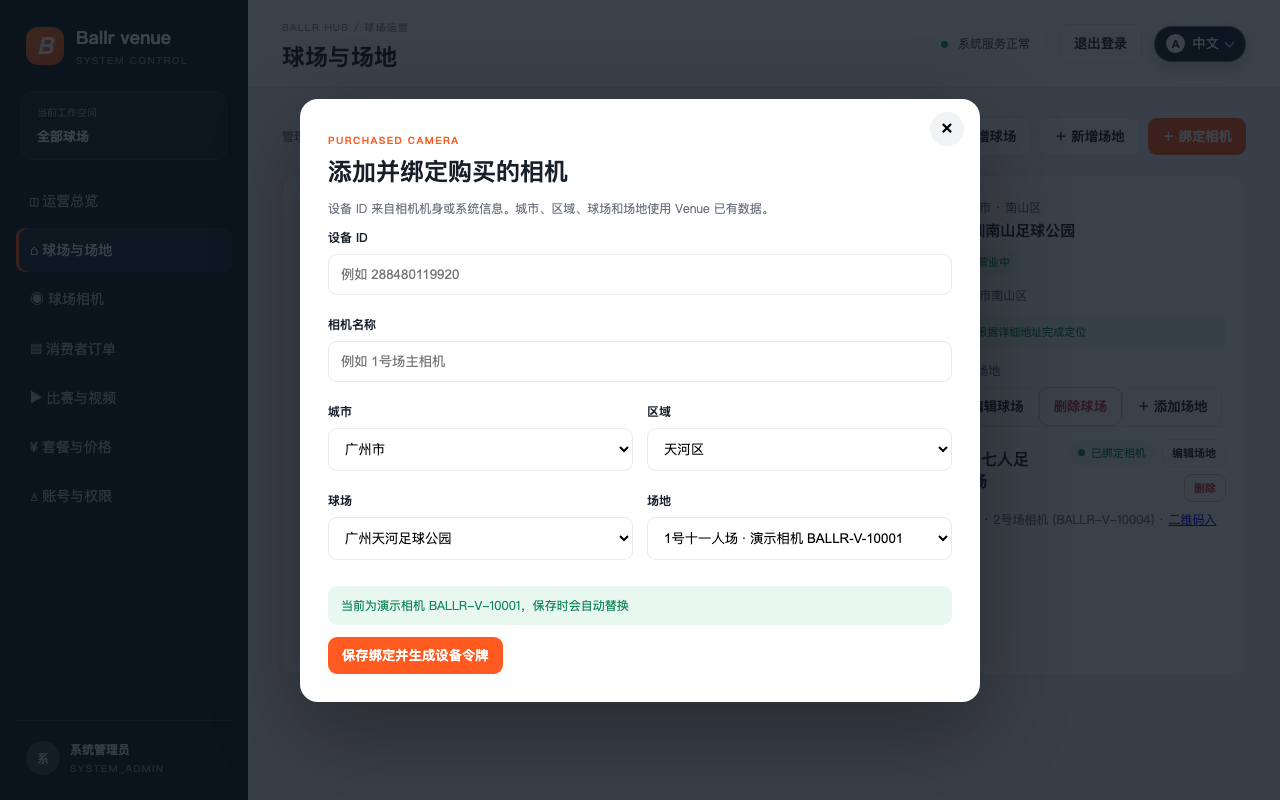
Open Venue cameras or Bind camera on the field card.
- 2
Enter the camera's real numeric device ID, a name and the target field.
- 3
Immediately copy the generated device connection configuration after saving.
- 4
Write the configuration securely to the correct camera; do not post it in public chats or screenshots.
- 5
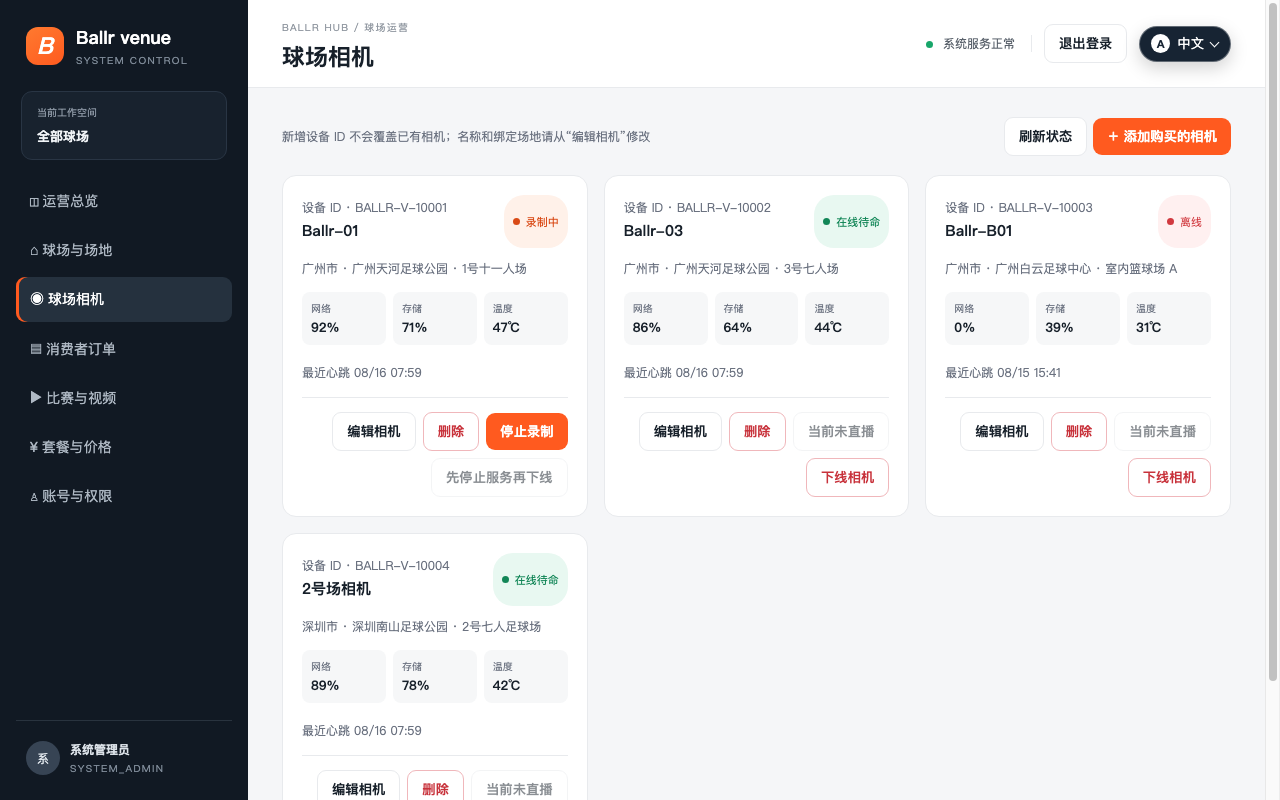
Wait for a heartbeat, then check network, storage, temperature and service state.
 View full size ↗
This real product screenshot identifies the workflow path. Follow the version note and current on-screen labels; replace an older versioned image with a sanitized current screenshot before publishing.
Ready for operation
- The camera is bound to the correct venue and field.
- Its latest heartbeat is healthy and the page does not show Offline.
- The device is idle or in a clearly confirmed standby state.
- A real short recording or live test has passed; Online alone is insufficient.
 View full size ↗
This real product screenshot identifies the workflow path. Follow the version note and current on-screen labels; replace an older versioned image with a sanitized current screenshot before publishing.
Take a camera offline or restore it
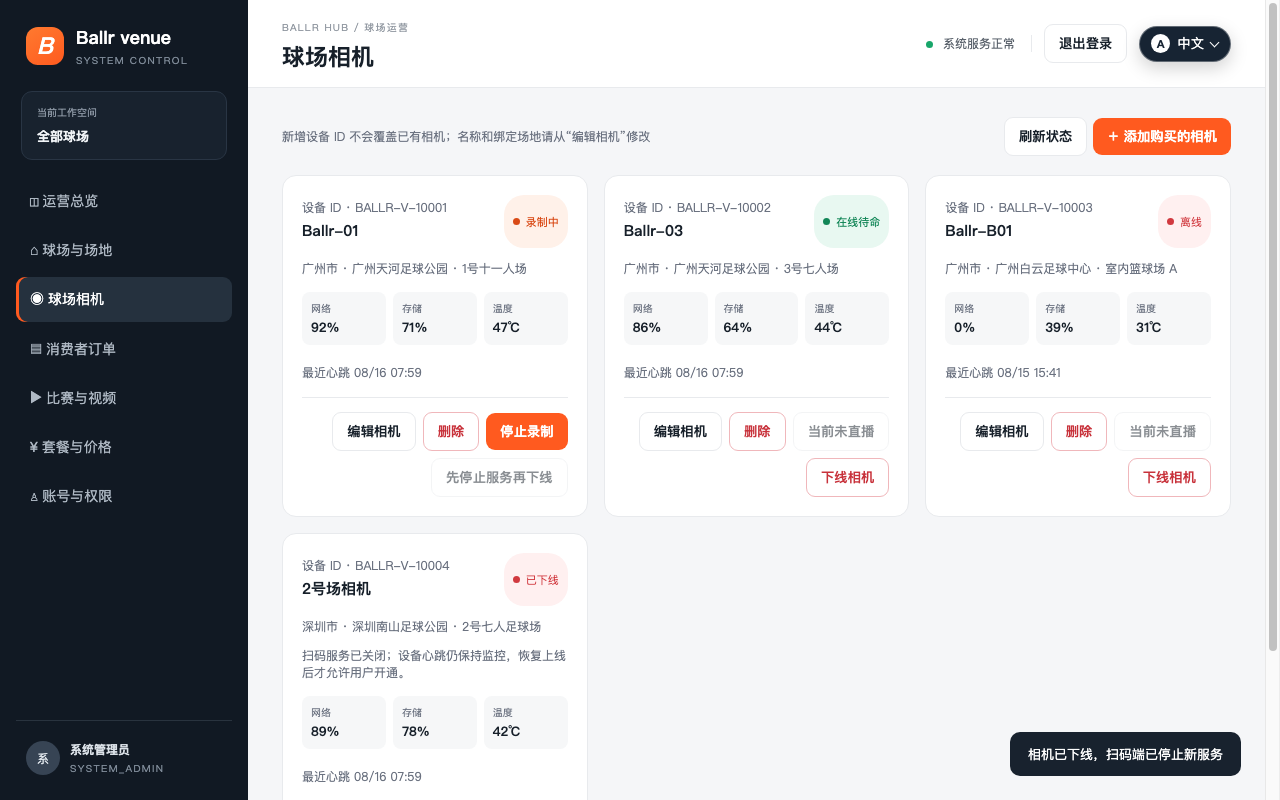
- Before maintenance or pausing sales, a venue administrator can take an idle camera offline from its card.
- A camera with an unfinished service cannot be taken offline; stop the order and wait for Idle first.
- Administrative offline blocks new QR services but keeps heartbeat monitoring, order history and video records.
- After restoring it, confirm the device is physically online and idle before selling services again.
 View full size ↗
This real product screenshot identifies the workflow path. Follow the version note and current on-screen labels; replace an older versioned image with a sanitized current screenshot before publishing.
If your screen differs from this guide, check the camera model, App or firmware version, account role and organization service status.