
Open the correct camera
- 1
Connect to the intended camera and confirm its live status. Open Settings → More settings → Recording parameters.
- 2
Wait for the current value and supported range to load. If reading fails or the camera does not support the setting, do not treat the empty value as zero or keep pressing Save.
Choose and save a value
- 1
Select a value within the range shown by this camera. A larger maximum bitrate can increase storage use and upload time; the best value depends on the scene and available storage.
- 2
Review the estimated size per hour. It is an estimate based on the configured maximum, not a measured file size or a guaranteed upload duration.
- 3
Press Save once and wait for confirmation. Reopen or refresh the setting to check that the camera reports the saved value.
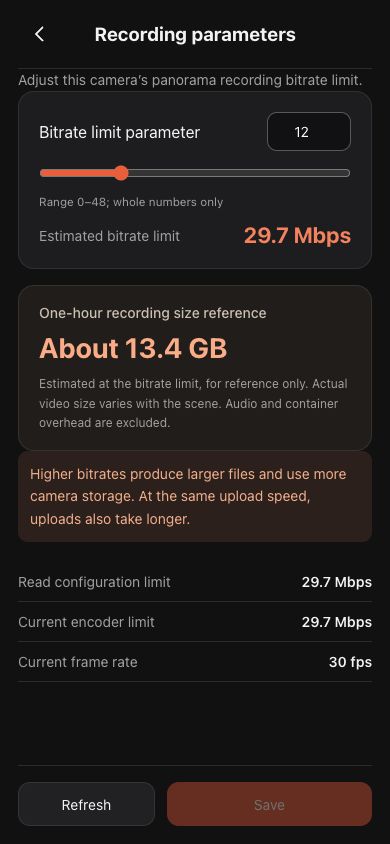 View full size ↗
Captured from the current product components with sanitized demonstration data. No customer account, password or stream key is shown.
Common questions
- Zero is the minimum supported value, not an automatic-quality switch and not a command to stop recording.
- If the page says the setting takes effect on the next recording, finish the current recording safely and apply it to the next one. Do not interrupt a match merely to change bitrate.
- After a timeout, read the value again before retrying. The camera may have saved the change even if the response was lost. If unsupported, check App and firmware compatibility or contact Ballr Support.
If your screen differs from this guide, check the camera model, App or firmware version, account role and organization service status.