
Three different connections
- Bluetooth: discovers, selects and sends basic control commands.
- Phone to camera: uses the same LAN or camera hotspot for preview and on-camera recordings.
- Camera to internet: uses Wi-Fi or SIM/4G for uploads and live streaming.
Connect Wi-Fi
- 1
Open Settings → Connection settings in the App.
- 2
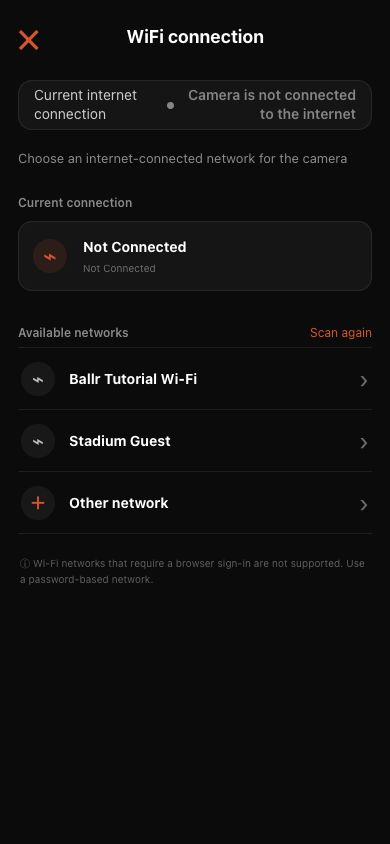
Tap Camera Wi-Fi and choose the target network. Tap Rescan if it is missing.
- 3
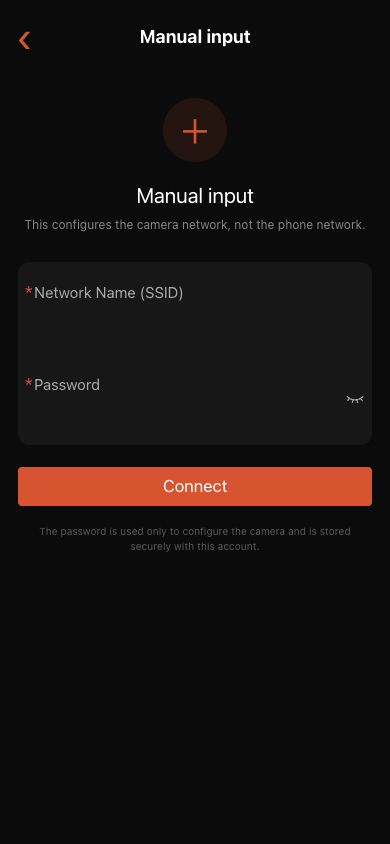
For Other network, enter the exact SSID and password. Captive-portal networks are not supported.
- 4
Tap Connect and keep the page open until setup completes; do not submit repeatedly.
- 5
Return to connection settings and run the connectivity test. Confirm the camera can access the internet, not only that Wi-Fi is connected.
 View full size ↗
In Camera Wi-Fi, choose the target network. The page also shows the current connection, Rescan, Other network and the captive-portal warning. The screenshot uses a sanitized demo network.
 View full size ↗
If the network is missing, choose Other network and enter the camera's SSID and password. This configures the camera, not the phone. No real password is shown.
Use SIM / 4G
- 1
Open SIM / 4G from connection settings.
- 2
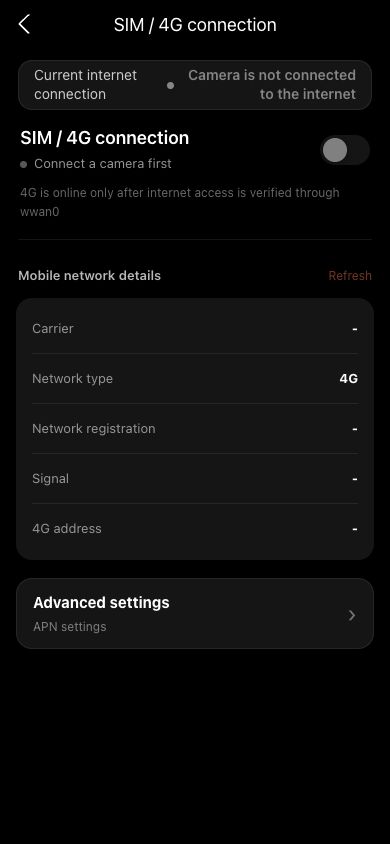
Confirm that the SIM, carrier, network type and signal are detected.
- 3
Run the connectivity test. Treat 4G as active only when active uplink or tested via explicitly says wwan0.
- 4
Change APN only when the carrier requires it, then turn 4G off and on after saving.
 View full size ↗
The SIM / 4G page shows the current uplink, carrier, registration, signal and 4G address. Registered alone does not prove internet access through 4G. The screenshot contains sanitized demo data.
If your screen differs from this guide, check the camera model, App or firmware version, account role and organization service status.